Psp Tutorial – Anna – English Translation
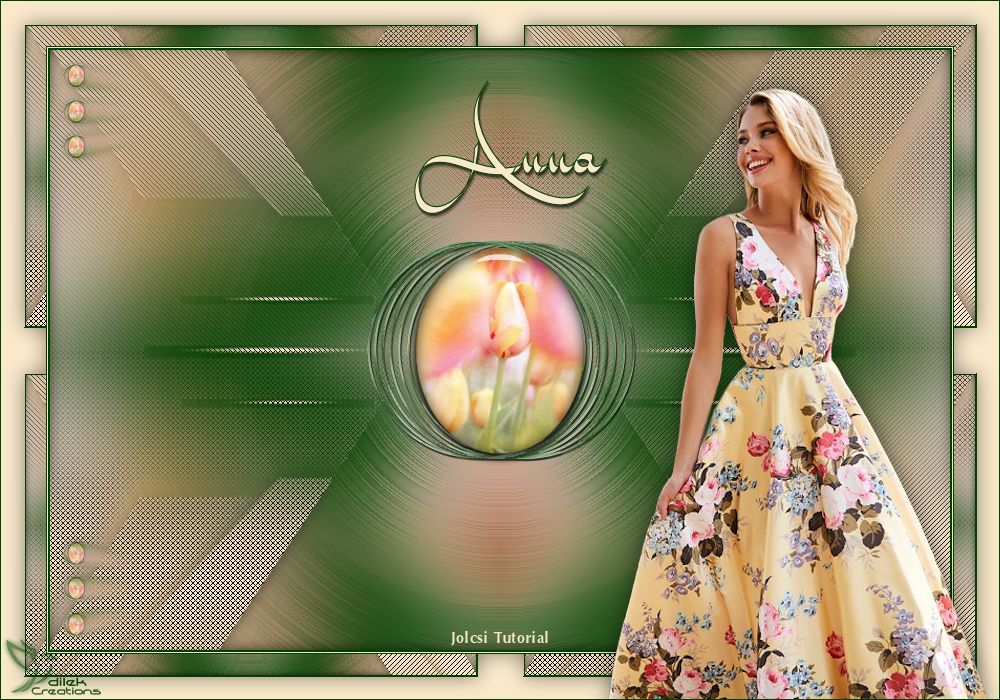
ANNA
Filters Unlimited – VM Toolbox – Zoom Blur
Filters Unlimited – VM Natural – Weave Distortion
Muras Meister- Pole Transform
Muras Meister – Copies
Alien Skin Eye Candy 5:Impact – Glass
Filters Unlimited – Bkg Designer sf10 I – Circus Maximus
Muras Seamless – Tiling with Shrink
AP [Lines] – Lines SilverLining
Narah_Mask_1431
PspSelection
Jolcsi alap
Jolcsi581
joldek
virág
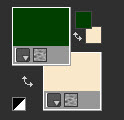
Colors
text
 or
or 
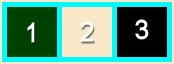
1 – #004000
2 – #f9e8ca
3 – #000000
Preparations
Set your foreground color to Foreground/Background Gradient.
Effects – Plugins – Xero – Soft Vignette : Pyramid
 Effects – Plugins – Filters Unlimited – VM Toolbox or VM Stylize – Zoom Blur : Default
Effects – Plugins – Filters Unlimited – VM Natural – Weave Distortion

Effects- Geometric effects – Perspective Horizontal

Image – Mirror – Mirror Horizontal ( Old Versions : Mirror )
Effects – Geometric effects – Perspective Horizontal : Same Settings
Result

2.
Effects – Plugins – MuRa’s Meister – Pole Transform

Effects – Plugins – MuRa’s Meister – Copies

Effects – Edge Effects – Enhance
Image – Resize : 40 percent ( resize all layers not checked )
Selections – Load/Save Selection – Load Selection From Disk – Select : 2397

Layers – New Raster Layer
File – Open : virág
Edit – Copy / Edit – Paste into Selection
Effects – Plugins – Alien Skin Eye Candy 5:Impact – Glass

Selections – Select None
Layers – Merge – Merge Down
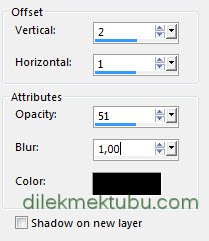
Effects – 3D Effects – Drop Shadow
Layers – Duplicate
Layers – Merge – Merge Down
3.
Layers – New Raster Layer
Layers – Arrange – Send to Bottom
Set your foreground color to dark color.
Fill with the foreground color : #004000
Selections – Select All
File – Open : Jolcsi581
Edit – Copy / Edit – Paste into Selection
Selections – Select None
Effects – Image efffects – Seamless Tiling : Default
Adjust- Blur- Radial Blur

Adjust – Blur – Gaussian Blur – Radius :35
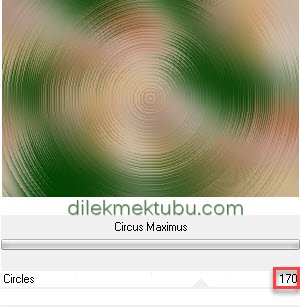
Effects – Filters Unlimited – Bkg Designer sf10 I – Circus Maximus
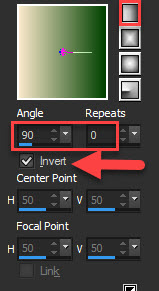
Effects – Reflection effects – Rotating Mirror

Repeat Effects – Reflection effects – Rotating Mirror : Default ( 0 – 0 : Reflect )
Adjust – Sharpness – Sharpen
Result – Raster 2 Layer

If the image is not like this ( because of yours tube! ).
Copy the ‘Jolcsi alap’ jpg image.
Select – Select All
File – Open : Jolcsi alap
Edit – Copy
Go back to your work.
Edit – Paste into Selection
Selections – Select None
Blend Mode:Luminance(Legacy)
4.
Activate the Raster 1 Layer
Activate the Pick Tool (K) ![]()
Position X: 317.00 – Position Y: 190.00
Press M to close the Pick Tool
Layers – New Raster Layer
Fill with the background color : #f9e8ca
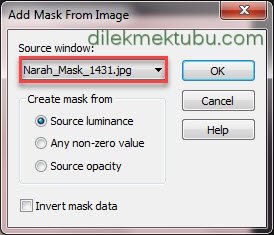
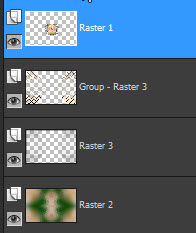
Layers – New Mask Layer – From Image : Narah_Mask_1431
Layers – Merge – Merge GroupEffects – AP [Lines] – Lines SilverLining

Selections – Select All
Selections – Float
Selections – Defloat
Selections – Invert
Layers – New Raster Layer
Effects – 3D effects – Cutout

Layers – Arrange – Move Down
Selections – Select None
5.
Activate the Raster1 Layer
Layers – Arrange – Bring to Top
Result

6.
Image – Add Borders 2 pixels – foreground color : #004000
Image – Add Borders 1 pixels – background color : #f9e8ca
Image – Add Borders 1 pixels – foreground color : #004000
Selections – Select All
Image – Add Borders 45 pixels – background color : #f9e8ca
Selections – Invert
Effects – MuRa’s Seamless – Tiling with Shrink : Default

Selections – Select None
Activate the Magic Wand Tool ![]()
Select the light colors

Selections -Invert
Effects 3D Effects – Drop Shadow

Selections – Select None
7.
File – Open : Jolcsi581
Edit – Copy
Go back to your work.
Edit – Paste As New Layer
Image – Resize : 105 percent ( resize all layers not checked )
Adjust – Sharpness – Sharpen
Place and shade as desired.
File – Open : joldek
Edit – Copy / Edit – Paste As New Layer
Position it as shown.
File – Open : Text
Edit – Copy / Edit – Paste As New Layer
Activate the Pick Tool (K) ![]()
Position X: 413.00 – Position Y: 79.00
Press M to close the Pick Tool
Effects 3D Effects – Drop Shadow
Layers – Duplicate
Activate the Raster 4 Layer.
Adjust – Blur – Gaussian Blur – Radius : 25
Effects – AP [Lines]- Lines SilverLining Same settings
Adjust – Sharpness – Sharpen
Image – Add Borders 1 pixels – foreground color : #004000
Write your signature.
File Save as JPEG
Thank you so much.
For Example
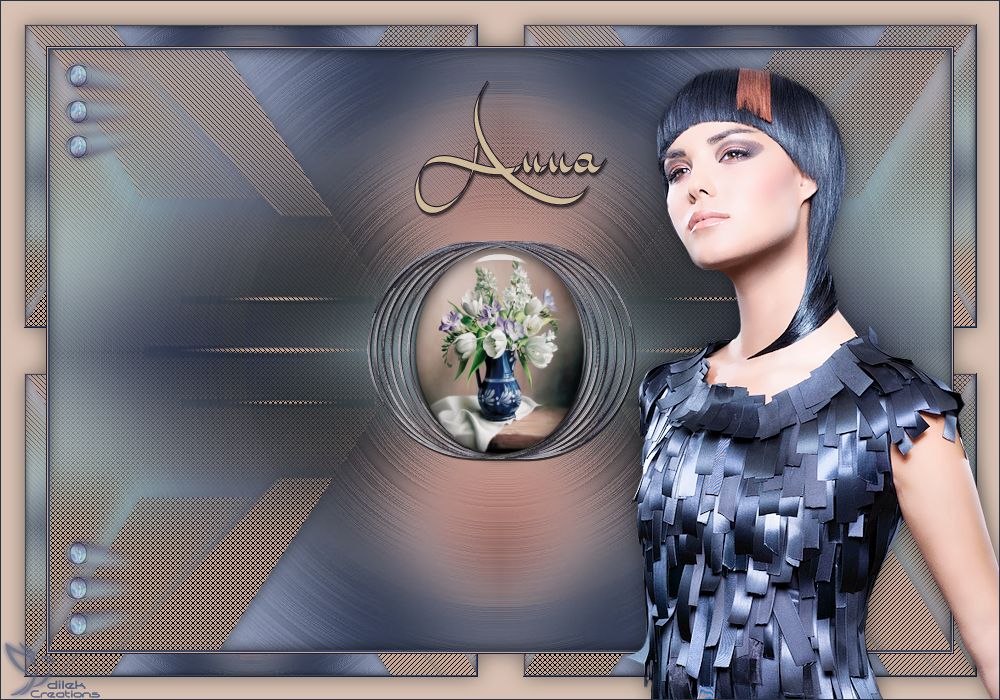
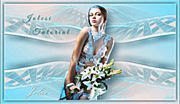
Women Tube : Isa ( Thank you )


Yorum gönder
Yorum yapabilmek için oturum açmalısınız.