Psp Tutorial, Never Give Up
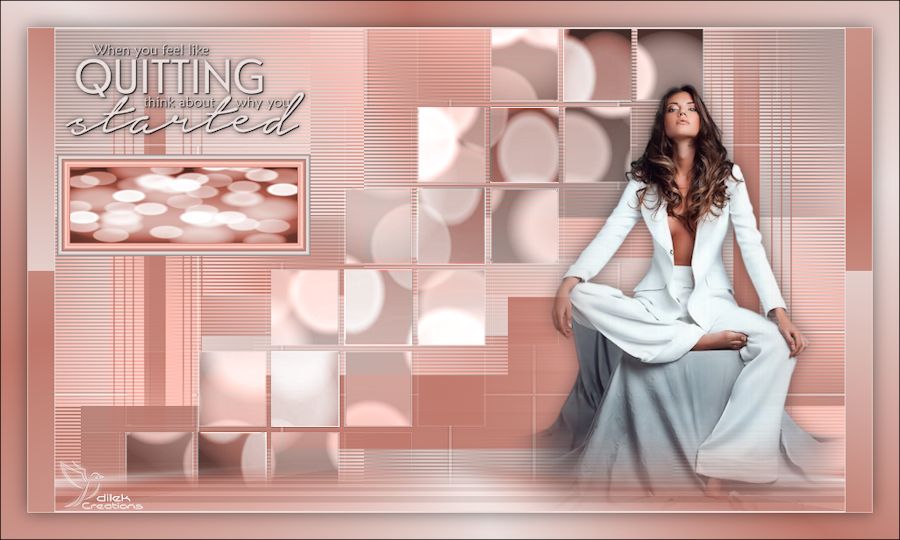
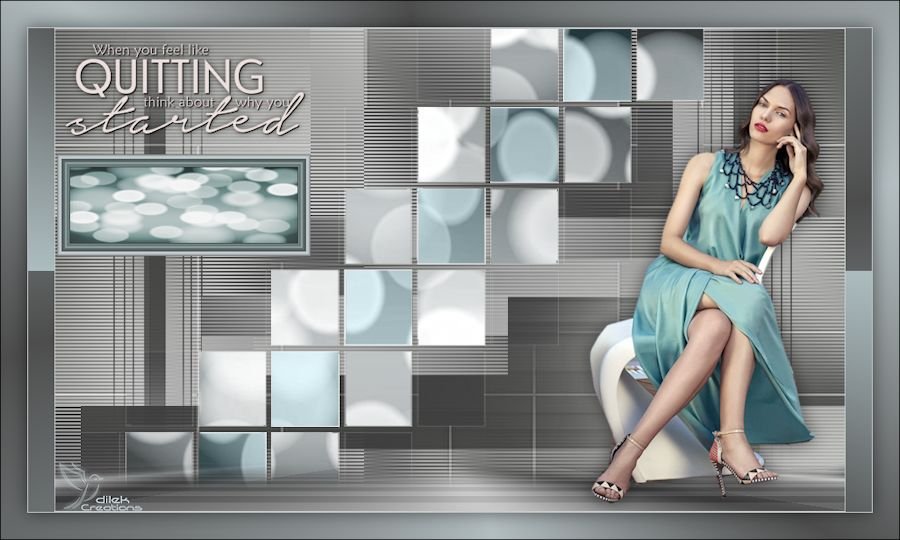
Never Give Up
English Psp Tutorial
This tutorial was created with Corel X7.
However, it can also be done with other versions.
Thank you very much for the beautiful Translations.
You can access the translations by clicking on the flags. 


However, it can also be done with other versions.
Thank you very much for the beautiful Translations.
You can access the translations by clicking on the flags.
Your Versions HERE 
Plugins
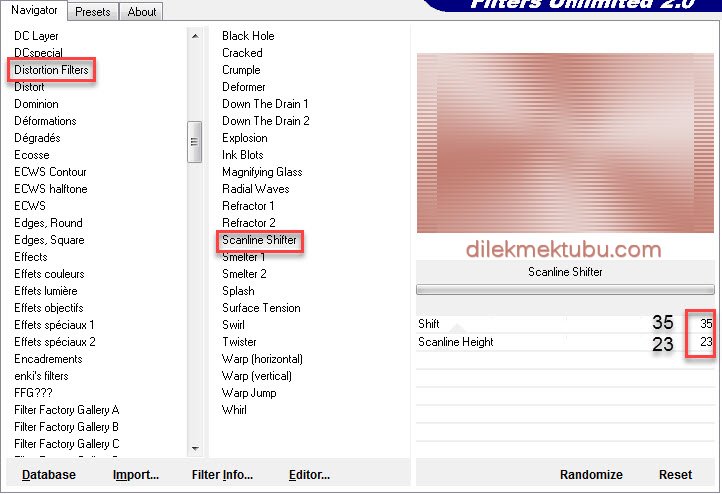
I.C. NET Software – Filters Unlimited 2.0
Distortion Filters – Scanline Shifter
Button & Frames
Button & Frames
VM Distortion – Tiles a GoGo
AP [Utulity] – Utulity Reflections
Carolaine and Sensibility – CSH Lines
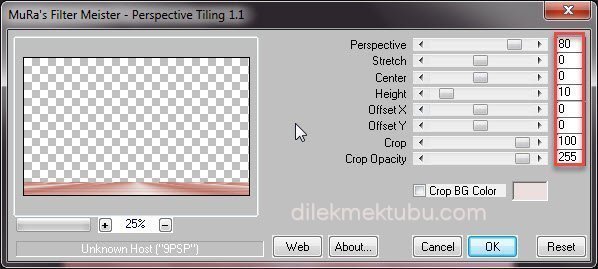
MuRa’s Meister – Perspective Tiling
AP [Utulity] – Utulity Reflections
Carolaine and Sensibility – CSH Lines
MuRa’s Meister – Perspective Tiling
Materials
Alpha_Never Give up
smArt_maszk_53
smArt_maszk_80
Narah_mask_0882
3188 – woman – LB TUBES
Bokeh_Never Give up
Text_Never Give up
smArt_maszk_80
Narah_mask_0882
3188 – woman – LB TUBES
Bokeh_Never Give up
Text_Never Give up
Colors
 or
or 
Colors
Preparations
Make the foreground color : #bf786b
Make the background color : #ebdfdd

Preparations
Make the foreground color : #bf786b
Make the background color : #ebdfdd
Open the masks in PSP and minimize them with the rest of the material.
You can change Blend Modes according to your colors.
We start working
You can change Blend Modes according to your colors.
We start working
1.
File – Open – Alpha_Never Give up
Window – Duplicate or Shift+D
(Close the original and proceed on the Copy)
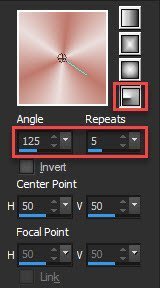
Set your foreground color to Foreground/Background Gradient.
Style : Radial – Angle : 125 – Repeats : 5
Window – Duplicate or Shift+D
(Close the original and proceed on the Copy)
Set your foreground color to Foreground/Background Gradient.
Style : Radial – Angle : 125 – Repeats : 5

Fill with the transparent image with your Gradient.
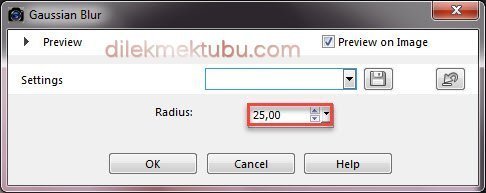
Adjust Blur – Gaussian Blur – Radius : 25
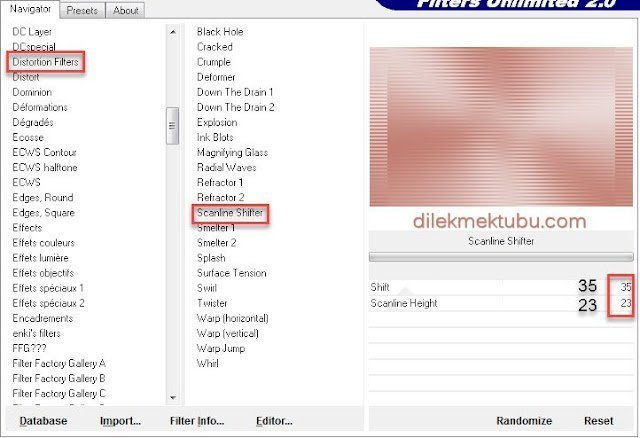
Effects – Plugins – I.C. NET Software – Filters Unlimited 2.0
Distortion Filters – Scanline Shifter
Adjust Blur – Gaussian Blur – Radius : 25

Effects – Plugins – I.C. NET Software – Filters Unlimited 2.0
Distortion Filters – Scanline Shifter
Adjust – Sharpness – Sharpen
Layers – Duplicate
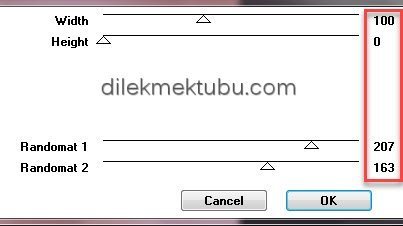
VM Distortion – Tiles a GoGo – Widht : 100 – Height : 0
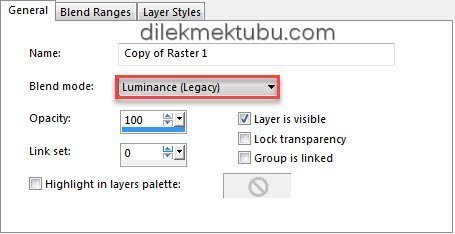
Layers – Properties – Blend Mode : Luminance (Legacy)
Layers – Merge – Merge Down
Result

2.
Layers – Duplicate
VM Distortion – Tiles a GoGo – Widht : 100 – Height : 0

Layers – Properties – Blend Mode : Luminance (Legacy)

Layers – Merge – Merge Down
Result

2.
Set your foreground color to yours color.
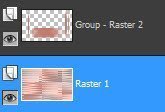
Layers – New Raster Layer
Fill with the foreground color : #bf786b
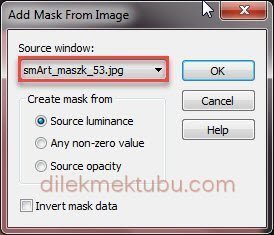
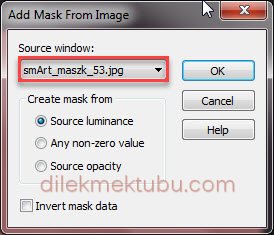
Layers – New Mask Layer – From Image – smArt_maszk_53
Adjust – Sharpness – Sharpen
Layers – Merge – Merge Group
3.
Activate the Raster 1 Layer
Selections – Load/Save – Load Selection From Alpha Channel – Selection #1
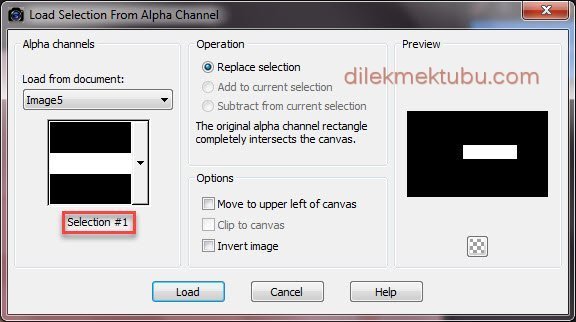
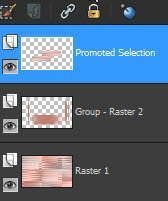
Selections – Promote Selections to Layer
Layers – Arrange – Bring to Top
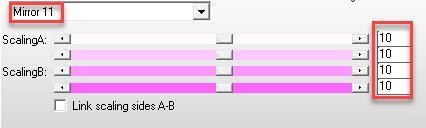
Effects – Plugins – AP [Utulity] – Utulity Reflections – Mirror 11
Selections – Select None
Layers – Duplicate
Image – Mirror – Mirror Horizontal ( Mirror)
Activate the Pick Tool (K)
Position X: 167.00 – Position Y: 304.00
Press M to close the Pick Tool
Layers – Merge – Merge Down
Result

3.
Layers – Merge – Merge Visible
Layers – New Raster Layer
Fill with the background color : #ebdfdd
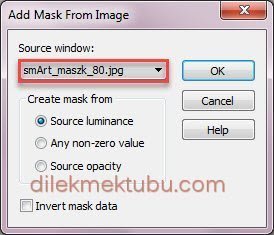
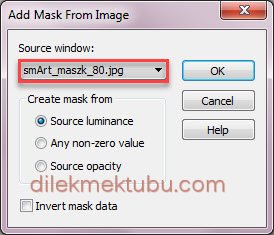
Layers – New Mask Layer – From Image – smArt_maszk_80
Layers – Duplicate
Layers – Merge – Merge Group
Effects – Edge Effects – Enhance
Layers – New Raster Layer
Selections – Load/Save – Load Selection From Alpha Channel – Selection #2
File – Open – Bokeh_Never Give up
Edit – Copy
Go back to your work.
Edit – Paste into Selection
Selections – Select None
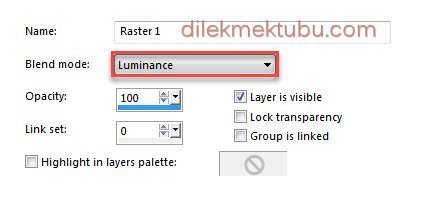
Layers – Properties – Blend Mode : Luminance
( Blend mode according to yours color. )
Layers – New Raster Layer
Selections – Load/Save – Load Selection From Alpha Channel – Selection #3
File – Open – Bokeh_Never Give up
Edit – Copy
Go back to your work.
Edit – Paste into Selection
Selections – Select None
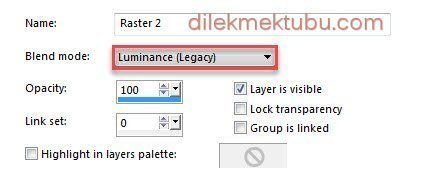
Layers – Properties – Blend Mode : Luminance (Legacy)
4.
Activate the Merged Layer

Selections – Load/Save – Load Selection From Alpha Channel – Selection #4
Selections – Promote Selections to Layer
Selections – Select None
Layers – Arrange – Bring to Top
Activate the Merged Layer
Layers – New Raster Layer
Fill with the background color : #ebdfdd
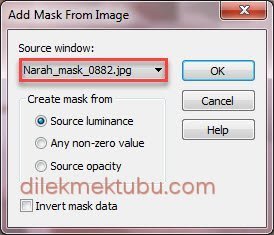
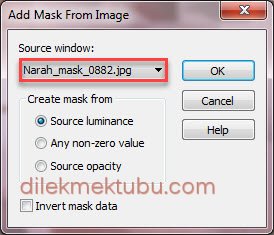
Layers – New Mask Layer – From Image – Narah_mask_0882
Layers – Merge – Merge Group
Effects – Edge Effects – Enhance
5.
Activate the Top Layer Layer : Promoted Selection Layer
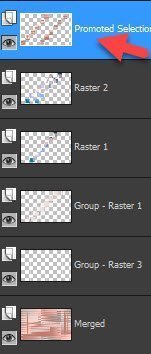
Selections – Load/Save – Load Selection From Alpha Channel – Selection #5
Layers – New Raster Layer
Fill with the background color : #ebdfdd
Selections – Modify – Contract : 5 pixels
Fill with the foreground color : #bf786b
Selections – Modify – Contract : 10 pixels
Layers – New Raster Layer
File – Open – Bokeh_Never Give up
Edit – Copy
Go back to your work.
Edit – Paste into Selection
Selections – Select None
Layers – Properties – Blend Mode : Luminance

Layers – Merge – Merge Down
6.
Repeat Selections – Load/Save – Load Selection From Alpha Channel – Selection #5
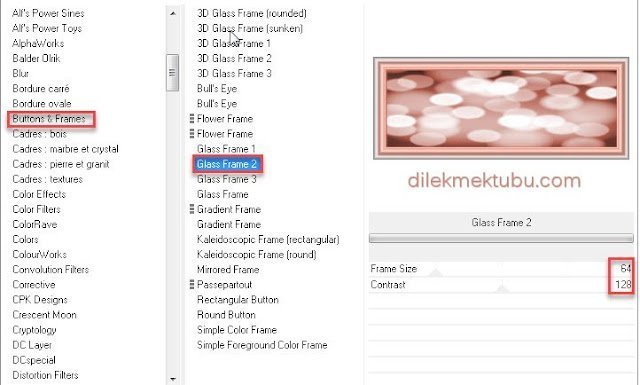
Effects – Plugins – I.C. NET Software – Filters Unlimited 2.0
Button & Frames – Glass Frame2 : Default
Selections – Select None
File – Open – Text_Never Give up
Edit – Copy
Go back to your work.
Edit – Paste As New Layer
Activate the Pick Tool (K)
Position X: 11.00 – Position Y: 17.00
Press M to close the Pick Tool
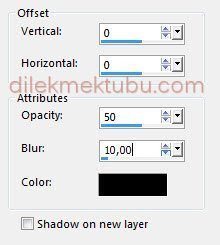
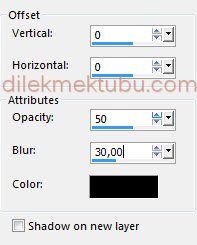
Effects – 3D Effects – Drop Shadow
7.
Set your foreground color to Foreground/Background Gradient : Same Settigs.

Layers – New Raster Layer
Fill with the gradient.
Adjust Blur – Gaussian Blur – Radius : 25 ( Same Settings )
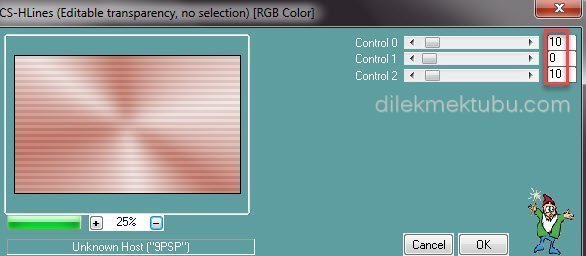
Effects – Plugins – Carolaine and Sensibility – CSH Lines
Effects – Plugins – MuRa’s Meister – Perspective Tiling
Adjust – Sharpness – Sharpen
Effects – 3D Effects – Drop Shadow

Selections – Load/Save – Load Selection From Alpha Channel – Selection #6
Press Delete : 5 Times
Selections – Select None
8.
File – Open – 3188 – woman – LB TUBES
Edit – Copy
Go back to your work.
Edit – Paste As New Layer
Image – Resize – 85 Percent ( Resize all layers – not checked )
Activate the Pick Tool (K)
Position X: 514.00 – Position Y: 58.00
Press M to close the Pick Tool
Effects – 3D Effects – Drop Shadow : Same Settings
9.
Image – Add Borders 1 Pixels – background color : #ebdfdd
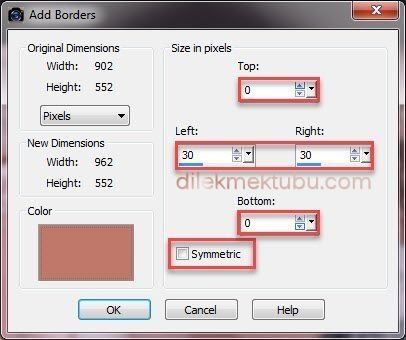
Image – Add Borders ( Symmetric not checked) : foreground color : #bf786b
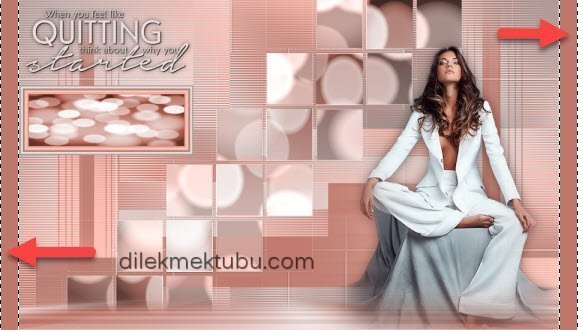
Activate the Magic Wand Tool

Select the 30 pixels left and right.
Layers – New Raster Layer
Fill with the gradient.
Effects – Plugins – AP [Utulity] – Utulity Reflections : Same Settings
Selections – Select None
Image – Add Borders 1 Pixels – background color : #ebdfdd
Selections – Select All
Image – Add Borders 30 Pixels – background color : #ebdfdd
Selections – Invert
Fill with the gradient.
Selections – Invert
Effects – 3D Effects – Drop Shadow : Same Settings
Selections – Select None
Image – Add Borders 1 Pixels – black : #000000
Write your signature.
Image – Resize 900 pixels.
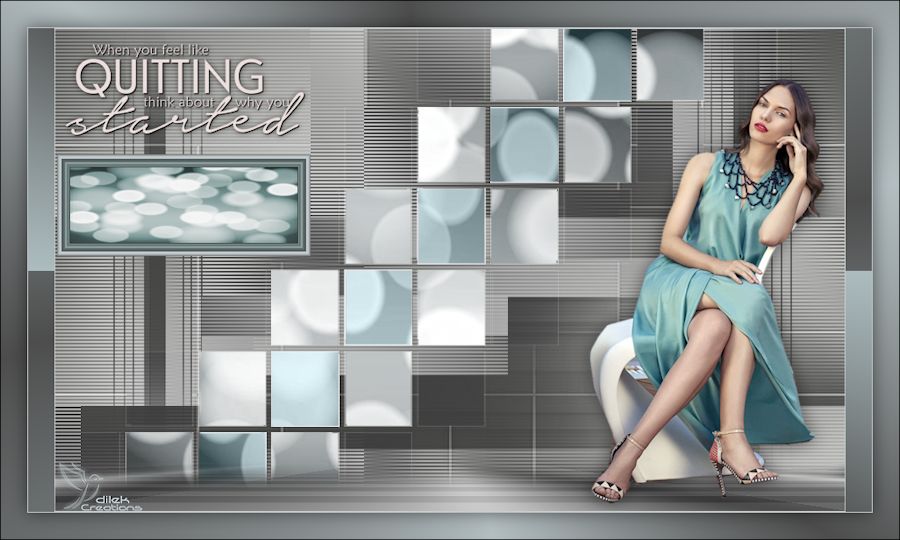
File Save as JPEG
Thank you so much.
For Example
Women Tube – Ana Ridzi ( Thank You)
VERSIYONLARINIZ için TIKLAYIN


Layers – New Raster Layer
Fill with the foreground color : #bf786b
Layers – New Mask Layer – From Image – smArt_maszk_53
Adjust – Sharpness – Sharpen
Layers – Merge – Merge Group
3.
Activate the Raster 1 Layer

Selections – Load/Save – Load Selection From Alpha Channel – Selection #1

Selections – Promote Selections to Layer
Layers – Arrange – Bring to Top
Effects – Plugins – AP [Utulity] – Utulity Reflections – Mirror 11

Selections – Select None
Layers – Duplicate
Image – Mirror – Mirror Horizontal ( Mirror)
Activate the Pick Tool (K)
Position X: 167.00 – Position Y: 304.00
Press M to close the Pick Tool
Layers – Merge – Merge Down
Result


3.
Layers – Merge – Merge Visible
Layers – New Raster Layer
Fill with the background color : #ebdfdd
Layers – New Mask Layer – From Image – smArt_maszk_80
Layers – Duplicate
Layers – Merge – Merge Group
Effects – Edge Effects – Enhance
Layers – New Raster Layer
Selections – Load/Save – Load Selection From Alpha Channel – Selection #2
File – Open – Bokeh_Never Give up
Edit – Copy
Go back to your work.
Edit – Paste into Selection
Selections – Select None
Layers – Properties – Blend Mode : Luminance
( Blend mode according to yours color. )

Layers – New Raster Layer
Selections – Load/Save – Load Selection From Alpha Channel – Selection #3
File – Open – Bokeh_Never Give up
Edit – Copy
Go back to your work.
Edit – Paste into Selection
Selections – Select None
Layers – Properties – Blend Mode : Luminance (Legacy)

4.
Activate the Merged Layer

Selections – Load/Save – Load Selection From Alpha Channel – Selection #4
Selections – Promote Selections to Layer
Selections – Select None
Layers – Arrange – Bring to Top
Activate the Merged Layer
Layers – New Raster Layer
Fill with the background color : #ebdfdd
Layers – New Mask Layer – From Image – Narah_mask_0882
Layers – Merge – Merge Group
Effects – Edge Effects – Enhance
5.
Activate the Top Layer Layer : Promoted Selection Layer

Selections – Load/Save – Load Selection From Alpha Channel – Selection #5
Layers – New Raster Layer
Fill with the background color : #ebdfdd
Selections – Modify – Contract : 5 pixels
Fill with the foreground color : #bf786b
Selections – Modify – Contract : 10 pixels
Layers – New Raster Layer
File – Open – Bokeh_Never Give up
Edit – Copy
Go back to your work.
Edit – Paste into Selection
Selections – Select None
Layers – Properties – Blend Mode : Luminance

Layers – Merge – Merge Down
6.
Repeat Selections – Load/Save – Load Selection From Alpha Channel – Selection #5
Effects – Plugins – I.C. NET Software – Filters Unlimited 2.0
Button & Frames – Glass Frame2 : Default

Selections – Select None
File – Open – Text_Never Give up
Edit – Copy
Go back to your work.
Edit – Paste As New Layer
Activate the Pick Tool (K)
Position X: 11.00 – Position Y: 17.00
Press M to close the Pick Tool
Effects – 3D Effects – Drop Shadow

7.
Set your foreground color to Foreground/Background Gradient : Same Settigs.
Layers – New Raster Layer
Fill with the gradient.
Adjust Blur – Gaussian Blur – Radius : 25 ( Same Settings )
Effects – Plugins – Carolaine and Sensibility – CSH Lines

Effects – Plugins – MuRa’s Meister – Perspective Tiling

Adjust – Sharpness – Sharpen
Effects – 3D Effects – Drop Shadow
Selections – Load/Save – Load Selection From Alpha Channel – Selection #6
Press Delete : 5 Times
Selections – Select None
8.
File – Open – 3188 – woman – LB TUBES
Edit – Copy
Go back to your work.
Edit – Paste As New Layer
Image – Resize – 85 Percent ( Resize all layers – not checked )
Activate the Pick Tool (K)
Position X: 514.00 – Position Y: 58.00
Press M to close the Pick Tool
Effects – 3D Effects – Drop Shadow : Same Settings
9.
Image – Add Borders 1 Pixels – background color : #ebdfdd
Image – Add Borders ( Symmetric not checked) : foreground color : #bf786b

Activate the Magic Wand Tool
Select the 30 pixels left and right.

Layers – New Raster Layer
Fill with the gradient.
Effects – Plugins – AP [Utulity] – Utulity Reflections : Same Settings
Selections – Select None
Image – Add Borders 1 Pixels – background color : #ebdfdd
Selections – Select All
Image – Add Borders 30 Pixels – background color : #ebdfdd
Selections – Invert
Fill with the gradient.
Selections – Invert
Effects – 3D Effects – Drop Shadow : Same Settings
Selections – Select None
Image – Add Borders 1 Pixels – black : #000000
Write your signature.
Image – Resize 900 pixels.
File Save as JPEG
Thank you so much.
For Example
Women Tube – Ana Ridzi ( Thank You)
VERSIYONLARINIZ için TIKLAYIN
I would be very happy if you send your nice works to my e-mail address.
My Mail Adress
dilekmektubu@gmail.com
Yorum gönder
Yorum yapabilmek için oturum açmalısınız.