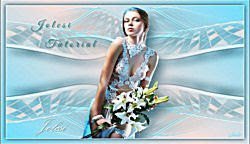
Psp Tutorial – Biborka – English Translation

You can find the original lesson by clicking on the banner.
Plugins
Virtual Painter – Virtual Painter 4
Flaming Pear – Flexify 2
Alien Skin Eye Candy 5:Impact – Glass
Materials
Tube : Jolcsi
Virág : Jolcsi
Keret : Net
 OR
OR 
Colors

1 – #b91d25
2 – #000000
Preparations
Make the foreground color : #b91d25
Make the background color : #000000

We start working
1.
Open the new transparent image of 900 X 600 pixels.
Selections – Select All
File – Open – háttér
Edit – Copy
Go back to your work.
Edit – Paste into Selection.
Adjust – Blur – Gaussian Blur / Radius : 30
Selections – Select None
2.
Effects – Plugins – Virtual Painter – Virtual Painter 4
Filter – Rectangles / Material – Canvas (Fine)

3.
Effects – Distortion Effects – Wind

Layers – Duplicate
Effects – Reflection Effects – Rotating Mirror

4.
Wiew – Rulers
Activate the Pick Tool (K) ![]()
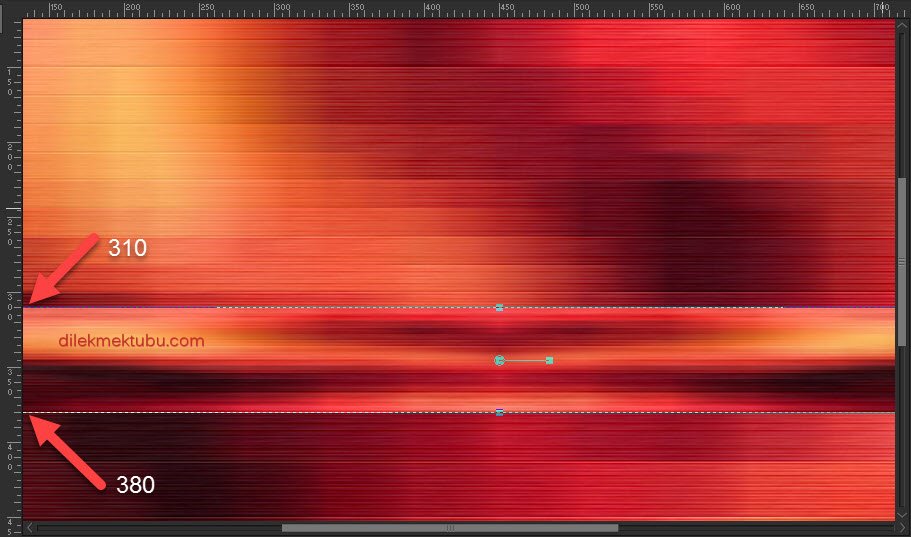
Press M to close the Pick Tool.
5.
Effects – Plugins – Flaming Pear – Flexify 2


6.
Activate the Magic Wand Tool. ![]()
Select the center of the circle.

File – Open – jol_háló
Edit – Copy
Go back to your work.
Edit – Paste into Selection.
Selections – Select None
7.
Layers – Duplicate
Image – Resize : 40 Percent ( Resize all layers not checked )
Activate the Magic Wand Tool. ![]()
Use the magic wand to select the transparent part.

Selections – Invert
Selections – Modify – Contract : 6

File – Open – jol_virág
Edit – Copy
Go back to your work.
Edit – Paste into Selection.
“IMPORTANT”
If you are using a different flower, choose a jpg image.
Use the mask ( !CircleGradient.msk ) in the material file.
8.
Effects – Plugins – Alien Skin Eye Candy 5:Impact – Glass : Clear

Selections – Select None
Repeat / Effects – Plugins – Alien Skin Eye Candy 5:Impact – Glass : Clear
Effects – 3D Effects – Drop Shadow : 3 / 3 / 46 / 6 – Color : #000000
( Shadow on layer not checked. )
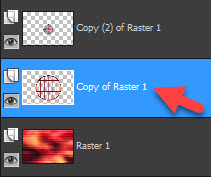
9.
Activate the Copy of Raster 1 Layer
File – Open – keret
Edit – Copy
Go back to your work.
Edit – Paste As New Layer
Image – Resize : 90 Percent ( Resize all layers not checked )
Effects – Edge Effects – Enhance
Effects – 3D Effects – Drop Shadow : Same Settings
10.
Activate the Copy of Raster 1 Layer
Effects – 3D Effects – Drop Shadow : 0 / 0 / 100 / 35 – Color : #000000
( Shadow on layer checked. )

Effects – Texture Effects – Mosaic Glass

Effects – Image Effects – Seamless Tiling : Default
Effects – Edge Effects – Enhance
Activate the Copy of Raster 1 Layer
Effects – 3D Effects – Drop Shadow : 0 / 0 / 63 / 35 – Color : #000000
( Shadow on layer not checked. )
Result

11.
Activate the Top Layer
( Copy (2) of Raster 1 Layer )
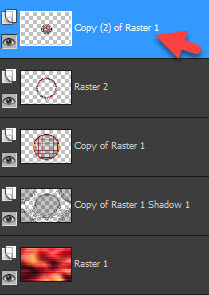
Layers – Merge – Merge Down : 2 Times
Adjust – Sharpness – Sharpen
12.
Image Add Borders 2 pixels – background color : #000000
Image Add Borders 2 pixels – foreground color : #b91d25
Image Add Borders 2 pixels – background color : #000000
Selections – Select All
Edit – Copy
Image Add Borders 45 pixels – background color : #000000
Selections – Invert
Paste into Selection
Adjust – Blur – Gaussian Blur : Same Settings
Adjust – Sharpness – Sharpen
Selections – Invert
Effects – 3D Effects – Drop Shadow : Same Settings
Adjust – Sharpness – Sharpen
Selections – Select None
13.
File – Open – Jolcsi624
Edit – Copy
Go back to your work.
Edit – Paste As New Layer
Image – Resize : 115 percent ( Resize all Layers not checked )
Place and shade as desired.
14.
File – Open – jol_deco
Edit – Copy
Go back to your work.
Edit – Paste As New Layer
Position it as shown.
15.
File – Open – text
Edit – Copy
Go back to your work.
Edit – Paste As New Layer
Place it according to the picture!
Effects – 3D Effects – Drop Shadow : 2 / 1 / 51 / 1 – Color : #000000
( Shadow on layer not checked. )
Image Add Borders 1 pixels – background color : #000000
Write your signature.
Image – Resize : 950 pixels. ( Resize all layers checked )
File Save as JPEG.
Thank you so much.
For Example

Tube – Isa ( Thank you )


Yorum gönder
Yorum yapabilmek için oturum açmalısınız.