Psp Tutorial – Style – English Translation
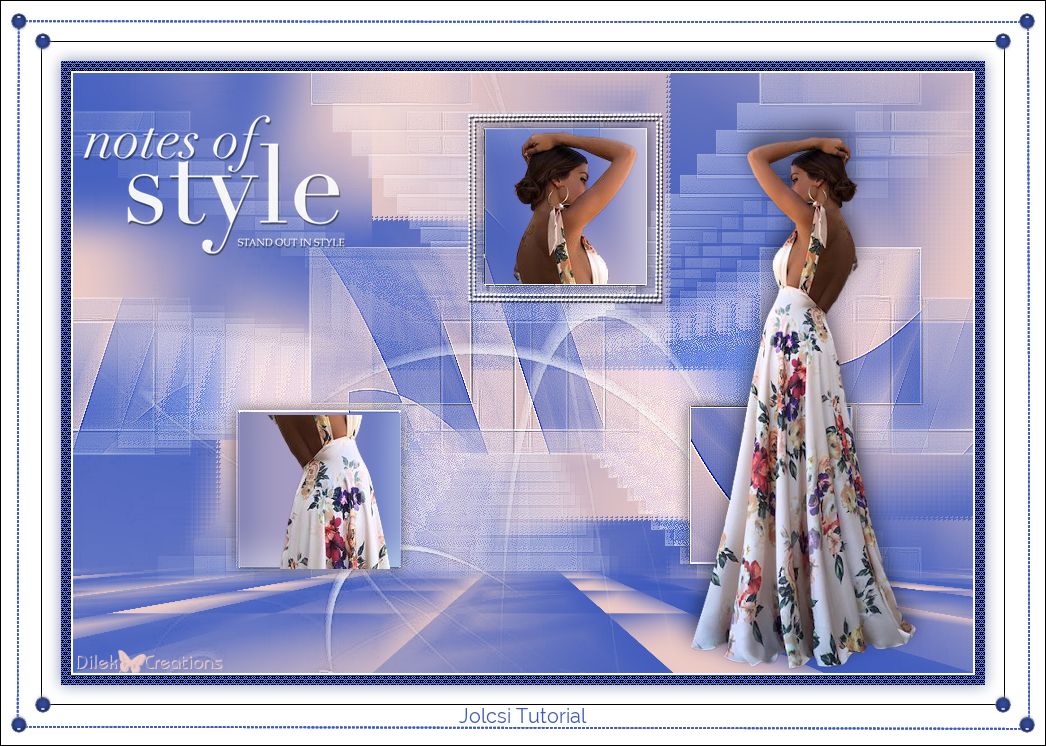
You can find the original lesson by clicking on the banner.
This tutorial is translated with Corel PSP X7.
Your Versions HERE
Plugins
Mehdi – Wavy Lab 1.1
Mehdi – Sorting Tiles
Filters Unlimited – Simple – Diamonds
Filters Unlimited – Bkg Designer 10III – Tremors
MuRa’s Meister – Perspective Tiling
Cybia – ScreenWorks
AAAFrames – Foto Frame
Materials
Selections From Alpha Channel
Narah_Mask_1395
Monaiekje mask 10
dekor – dekor2
j125 – text
Colors
 or
or 
Colors
1 – #3e5abc
2 – #efccc5
3 – #ffffff
Preparations
You can adjust the Blend Mode / Opacity at your own discretion.
We start working
File – Open – Selections From Alpha Channel
1.
Effects – Plugins – Mehdi – Wayv Lab 1.1

Adjust – Blur – Gaussian Blur – Radius: 20
2.
Effects – Plugins – Mehdi – Shorting Tiles

Layers – Duplicate
3.
Effects – Plugins – I.C. NET Software – Filters Unlimited 2.0
Simple – Diamonds


4.
Effects – Distortion Effects – Wave

5.
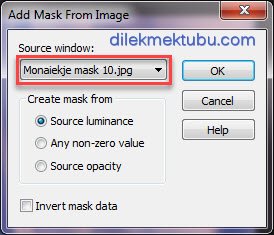
Layers – New Mask Layer – From Image : Monaiekje mask 10
Layers – Merge – Merge Group
Effects – Edge Effects – Enhance More
6.
Selections – Load/Save – Load Selection From Alpha Channel : Selection #1

Selections – Promote Selection to Layer
Adjust – Blur – Gaussian Blur – Radius: 20
7.
File – Open – j125
Image – Mirror ( Mirror – Horizontal : Ctrl+B )
Edit – Copy
Go back to your work.
Edit – Paste As New Layer
Activate the Move Tool (M) ![]()
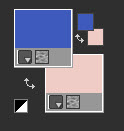
We have aligned the top of the tube like the example below!

Selections – Invert
Edit – Cut ( Delete )
Selections – Select None
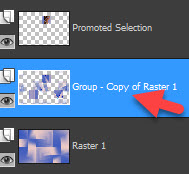
Layers – Merge – Merge Down
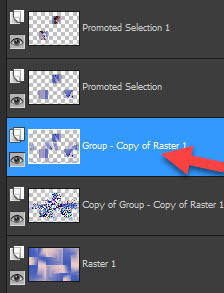
Activate the Group – Copy of Raster 1 Layer.
8.
Selections – Load/Save – Load Selection From Alpha Channel : Selection #2

Selections – Promote Selection to Layer
Adjust – Blur – Gaussian Blur – Radius: 20
9.
File – Open – j125
Edit – Copy
Go back to your work.
Edit – Paste As New Layer
Activate the Move Tool (M) ![]()
Now, we align the middle part of the tube inside the bottom frame!

Selections – Invert
Edit – Cut ( Delete )
Selections – Select None
Layers – Merge – Merge Down
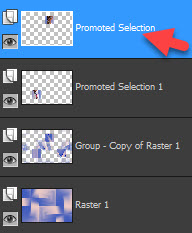
Activate the Prometed Selection Layer.
Layers – Merge – Merge Down
Activate the Group – Copy of Raster 1 Layer.
10.
Selections – Load/Save – Load Selection From Alpha Channel : Selection #3

Selections – Promote Selection to Layer
Effects-3D effects – Drop Shadow : 0 / 0 / 53 / 20 – Color : #000000
Selections – Select None
Activate the Group – Copy of Raster 1 Layer.
Layers – Duplicate
11.
Effects – Reflection Effects – Feedback

Layers – Arrange – Move Down
Effects – Plugins – I.C. NET Software – Filters Unlimited 2.0
Bkg Designer 10 III – Tremors : Default


Layers – Properties – Blend Mode : Screen
Layers – Properties – Opacity : 69
Effects – Edge Effects – Enhance
Activate the Group – Copy of Raster 1 Layer.
12.
Layers – New Raster Layer
Fill with the Color-3 : #ffffff
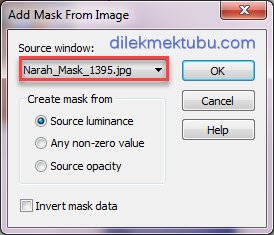
Layers – New Mask Layer – From Image : Narah_Mask_1395
Layers – Merge – Merge Group
Image – Mirror ( Mirror – Horizontal : Ctrl+B )
Effects – Edge Effects – Enhance
Activate the Raster 1 Layer.
13.
Selections – Load/Save – Load Selection From Alpha Channel : Selection #4
Selections – Promote Selection to Layer
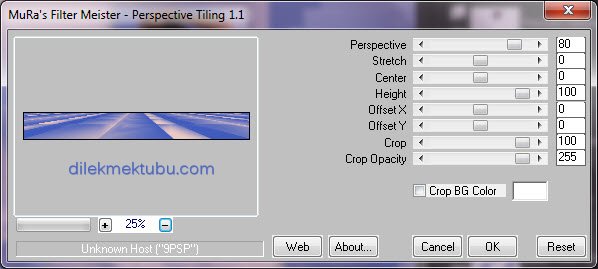
Effects – Plugins – MuRa’s Meister – Perspective Tiling : Default
Selections – Invert
Selections – Modify – Feather

Delete : 5 X times.
Selections – Select None
Layers – Arrange – Move Up : 2 X times.
Activate the Raster 1 Layer.
14.
Selections – Load/Save – Load Selection From Alpha Channel : Selection #5

Selections – Promote Selection to Layer
Adjust – Blur – Gaussian Blur – Radius: 20
Selections – Select None
15.
Activate the Raster 1 Layer.
Effects – Plugins – I.C. NET Software – Filters Unlimited 2.0
Bkg Designer 10 III – Tremors : Default
Activate the Top Layer.

16.
File – Open – “text“
Edit – Copy
Go back to your work.
Edit – Paste As New Layer
Activate the Pick Tool (K) ![]()
Position X : 10.00 / Position Y : 38.00
Press M to close the Pick Tool.
17.
File – Open – “j125“
Edit – Copy
Go back to your work.
Edit – Paste As New Layer
Image – Mirror ( Mirror – Horizontal : Ctrl+B )
Image – Resize : 90 Percent ( Resize all layers not checked )
Position as shown.
Make the shade as you want.
18.
File – Open – “dekor“
Edit – Copy
Go back to your work.
Edit – Paste As New Layer
Activate the Pick Tool (K) ![]()
Position X : 395.00 / Position Y : 40.00
Press M to close the Pick Tool.
19.
Image Add Borders 2 pixels white color : #ffffff (Color3)
Selections – Select All
Image Add Borders 10 pixels foreground color : #3e5abc (Color1)
Selections – Invert
Effects – Plugins – Cybia – Screen Works : Chain Link – Transparency : 0

Adjust – Sharpness – Sharpen
Selections – Select None
20.
Image Add Borders 40 pixels white color : #ffffff (Color3)
Effects – Plugins – AAA Frames – Foto Frame

Image Add Borders 20 pixels white color : #ffffff (Color3)
21.
File – Open – “dekor2“
Edit – Copy
Go back to your work.
Edit – Paste As New Layer
If you need to color your color
Adjust – Hue and Saturation – Colorize
Layers – Merge – Merge Down
Selections – Select All
Selections – Modify – Contract : 60 pixels
Effects-3D effects – Drop Shadow : 0 / 0 / 55 / 22
(Color : Darker version of your dark color.)
Selections – Select None
Write your signature.
Image Add Borders 1 pixels black color : #000000
File Save as JPEG.
Thank you so much.
For Example

Woman Tube : Tocha ( Thank you )


Yorum gönder
Yorum yapabilmek için oturum açmalısınız.