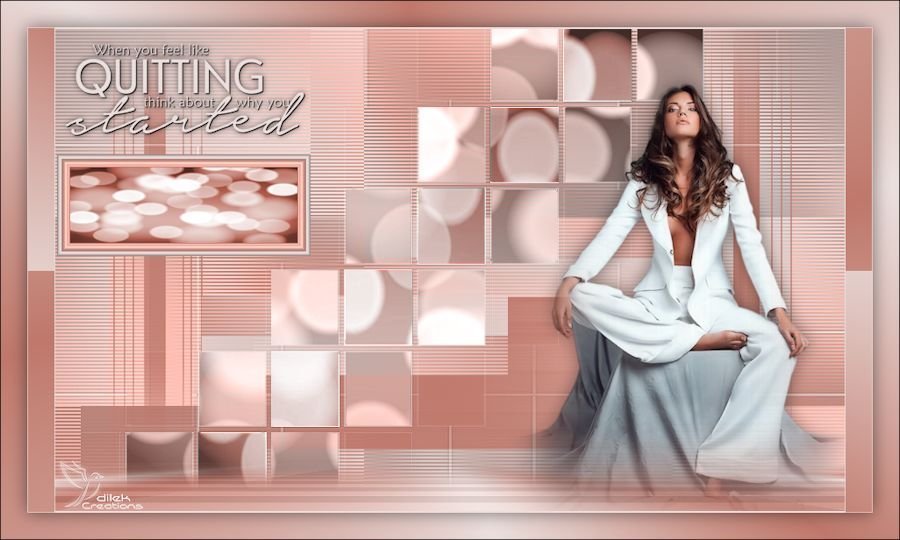
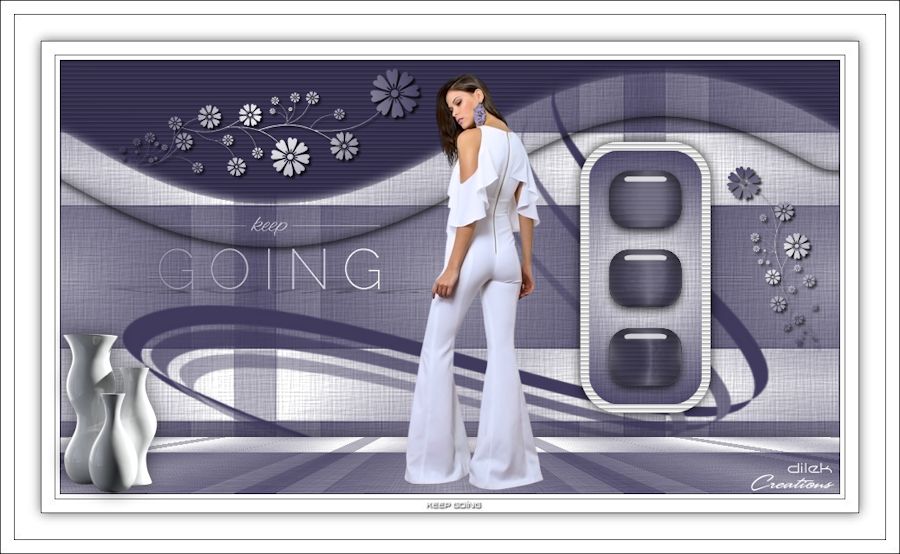
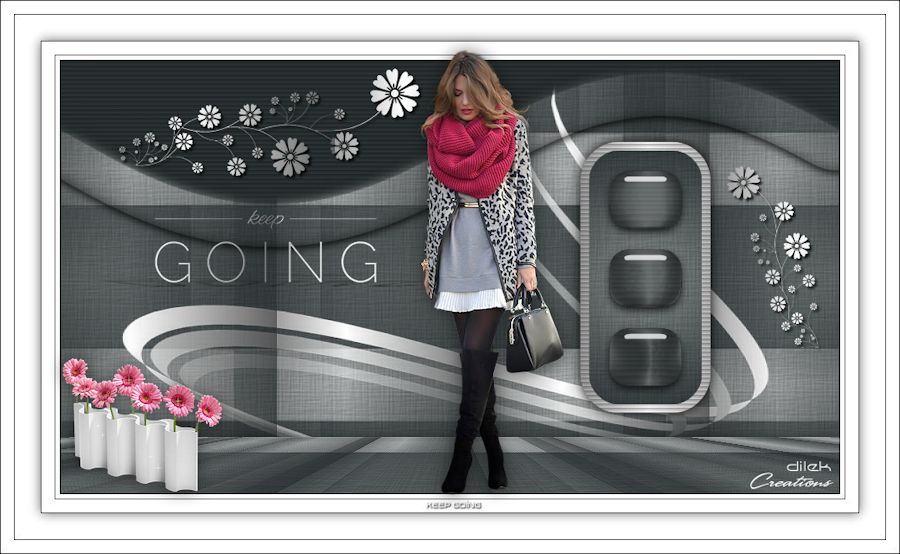
KEEP GOING
English Psp Tutorial
This tutorial was created with Corel X7.
However, it can also be done with other versions.
Thank you very much for the beautiful Translations.
You can access the translations by clicking on the flags.
However, it can also be done with other versions.
Thank you very much for the beautiful Translations.
You can access the translations by clicking on the flags.
Your Versions HERE ![]()
Plugins
Mura’s Meister – Perspective Tiling
Alien Skin – Eye Candy 6 – Text Selection – Glass
Alien Skin – Eye Candy 6 – Text Selection – Perspective Shadow
If you can’t install “Eye Candy 6” you can use ” Eye Candy 5 Impact “
If you can’t install “Eye Candy 6” you can use ” Eye Candy 5 Impact “
Materials
Keep going-Alpha Layer
Preset – going-1.fls
Preset – going-2.fls
Preset – going-3.fls
Keep Going.PspBrush
Texture – hatch fine.bmp
Keep Going-Border Frame
Hazal Mask Jpg
Narah_mask_0457.jpg
femme552-coly.png
Grisi_Tube_Decoration_316
Keep Going.jpg
Colors
 or
or Preparations
Make your foreground color : #ffffff
Make the background color : #403a5c
Make the background color : #403a5c

Gradient Setting

We start working
1 – File – Open – Keep Going-AlphaLayer
2 – Window – Duplicate or Shift+D
(Close the original and proceed on the Copy)
3- Fill with Color #403a5c – Background Color
4 – Layers – New Raster Layer
5 – Fill with Foreground Color – #ffffff
6 – Layers – New Mask Layer – From Image – Mask Hazal

7 – Layers – Merge – Merge Grup
8 – Adjust – Sharpness – Sharpen
9 – Layers – Merge – Merge Down
10 – Effects – Texture Effects – Texture – Hatch Fine

11 – Layers – Duplicate
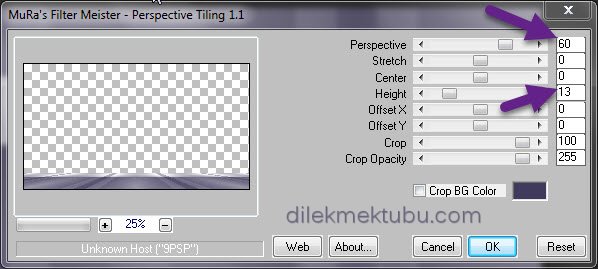
12 – Effects – Mura’s Meister – Perspective Tiling
13 – Adjust – Sharpnes – Sharpen
14 – Effects – 3D Effects – Drop Shadow

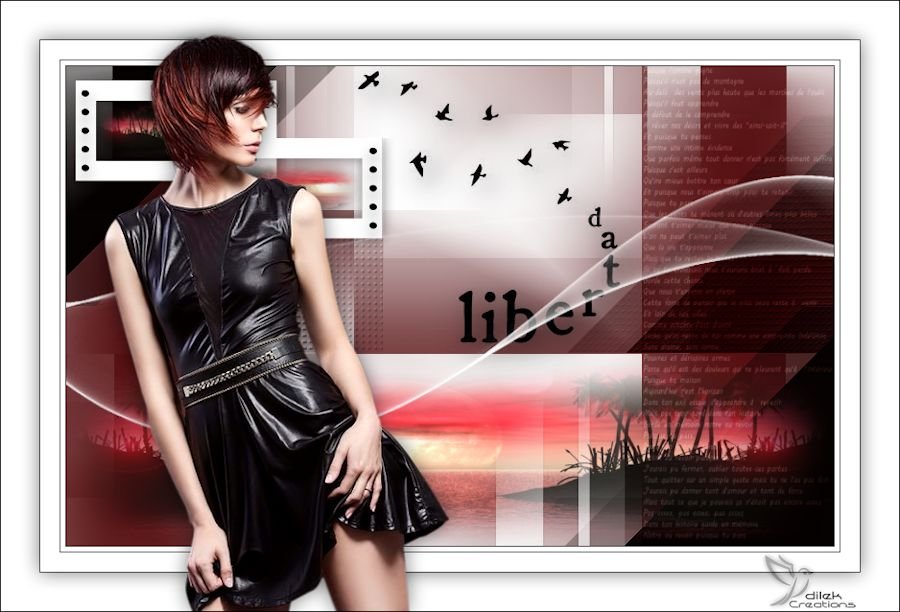
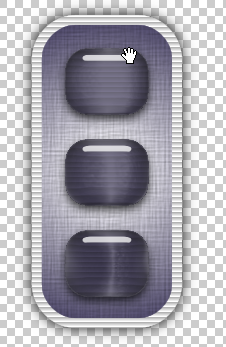
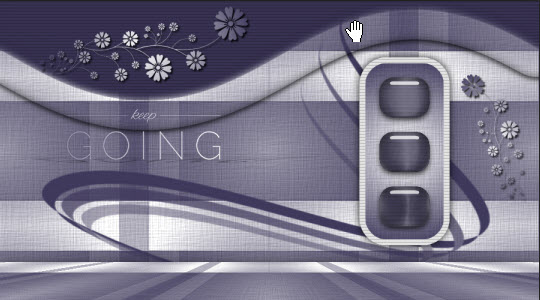
Result

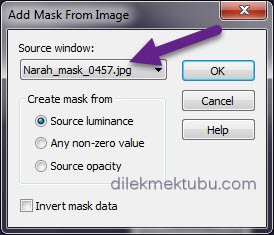
15 – Layers – New Raster Layer
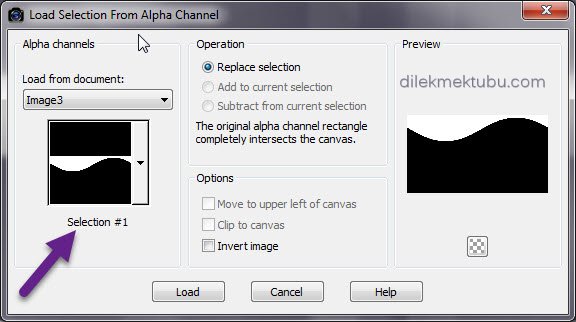
16 – Selections – Load/Save – Load Selection From Alpha Channel – Selection#1
17 – Fill with Background Color – #403a5c
18 – Effects – Texture Effects – Fur

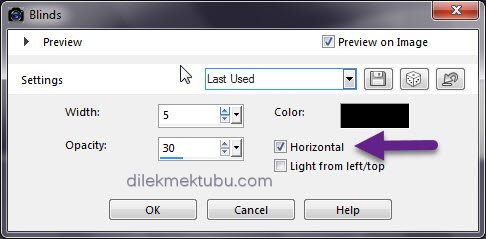
19 – Effects – Texture Effects – Blinds
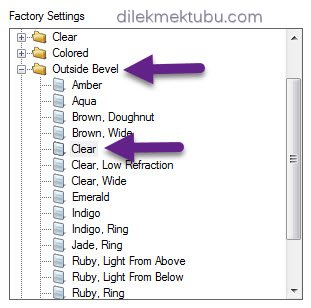
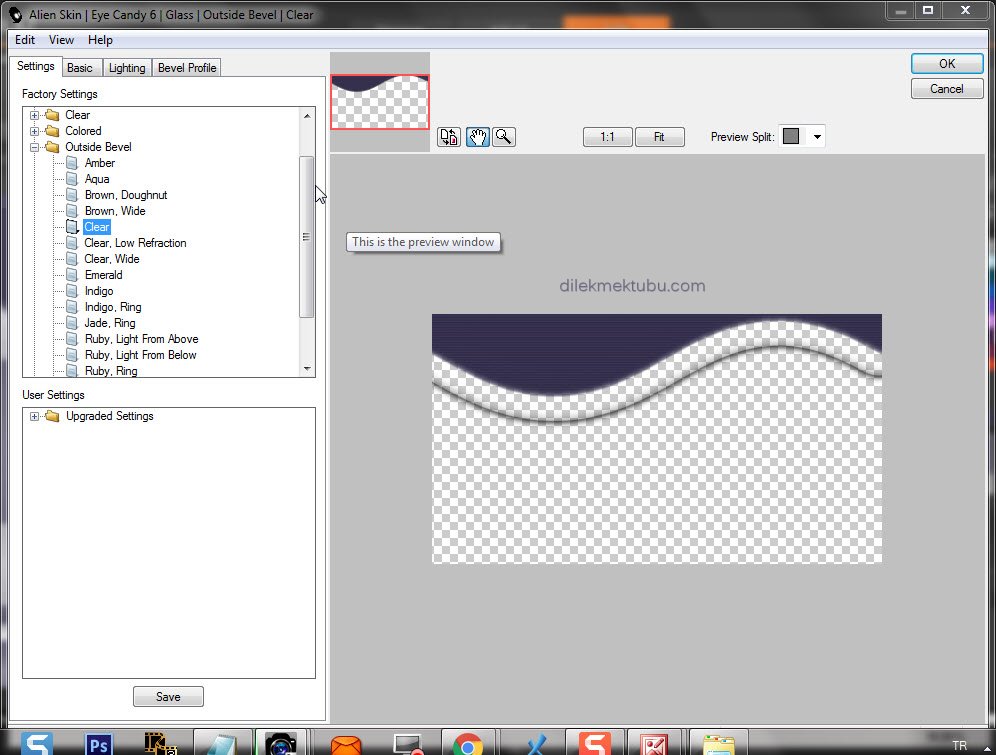
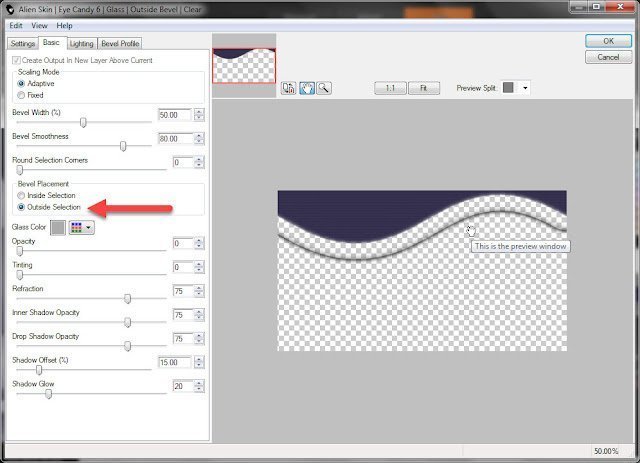
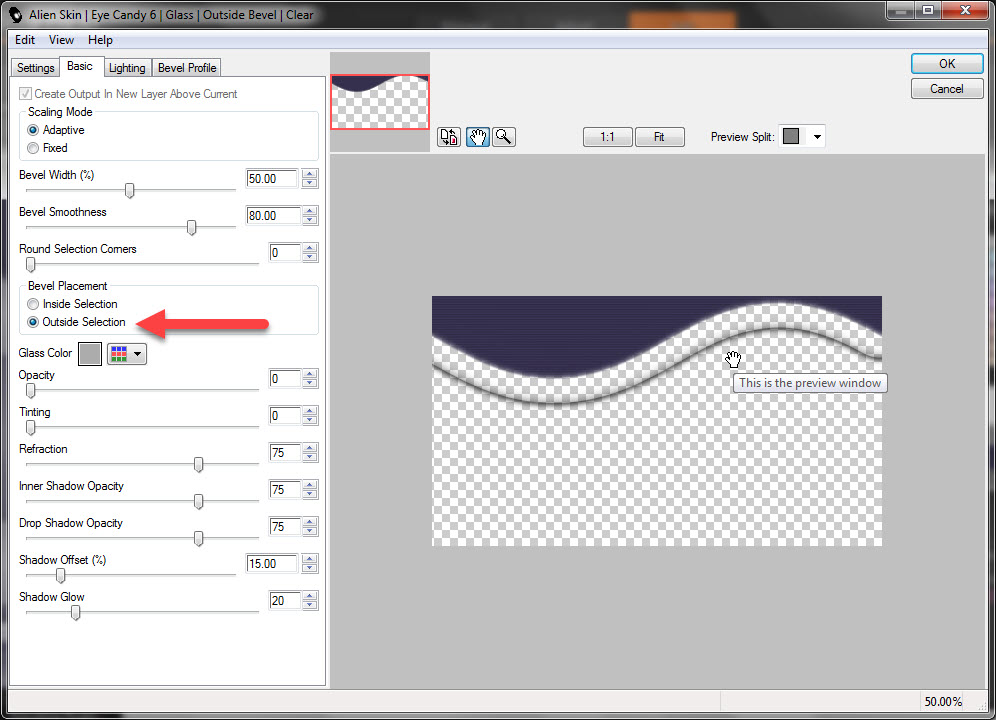
20 – Effects – Alien Skin – Eye Candy 6 – Text Selection – Glass – Outside Bevel – Clear
If you can’t install “Eye Candy 6”
or
Alien Skin Eye Candy 5 Impact – Glass
21 – Selection – Select None
or
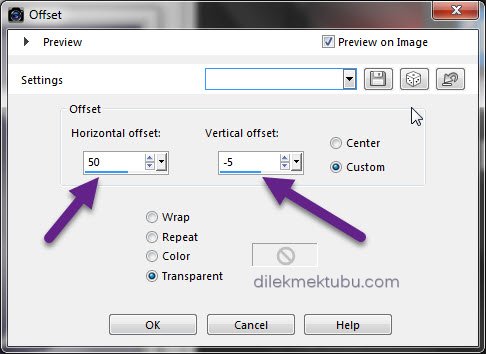
Alien Skin Eye Candy 5 Impact – Glass
21 – Selection – Select None
Result

22 – Layers – New Raster Layer
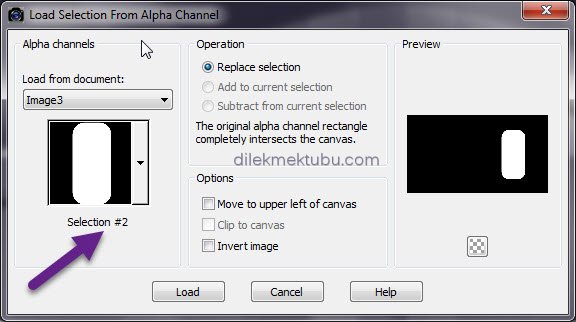
23 – Selections – Load/Save – Load Selection From Alpha Channel – Selection#2
24 – Fill with Foreground Color – #ffffff
25 – Effects – Texture Effects – Blinds – Same Setings
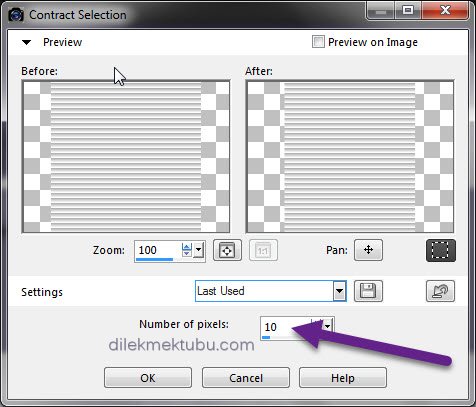
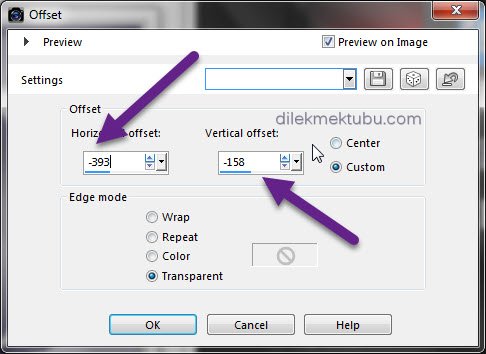
26 – Selection – Modify – Contract – 10 Piksel
27 – Fill with Gradient
28 – Effects – Texture Effects – Texture – Hatch Fine – Same Setting
29 – Selection – Select None
30 – Effects – Alien Skin – Eye Candy 6 – Text Selection – Perspective Shadow – going1

31 – Selections – Load/Save – Load Selection From Alpha Channel – Selection#3

32 – Fill with – Background color – #403a5c
33 – Effects – Texture Effects – Blinds – Same Setings
34 – Effects – Alien Skin – Eye Candy 6 – Text Selection – Glass – With Reflection – Steel

35 – Selection – Select None
36- Layers – New Raster Layer
37 – Selections – Load/Save – Load Selection From Alpha Channel – Selection#4

38 – Fill with Gradient
39 – Selection – Select None
40 – Effects – Alien Skin – Eye Candy 6 – Text Selection – Perspective Shadow – Settings – going2

41 – Layers – New Raster Layer
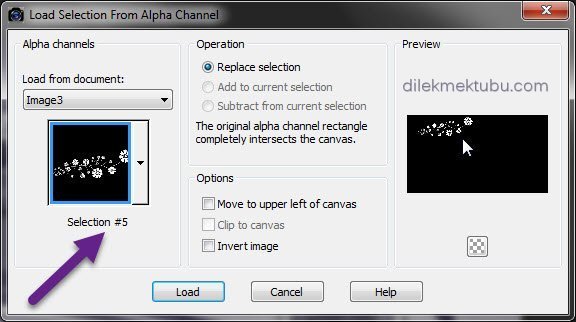
42 – Selections – Load/Save – Load Selection From Alpha Channel – Selection#5

43 – Fill with Gradient
44 – Selection – Select None
45 – Effects – Alien Skin – Eye Candy 6 – Text Selection – Perspective Shadow – Same Settings (going-2)
46 – Layers – New Raster Layer
47 – Activate – Paint Brush Tool – keep going brush – with gradient

48 – Adjust – Sharpness – Sharpen
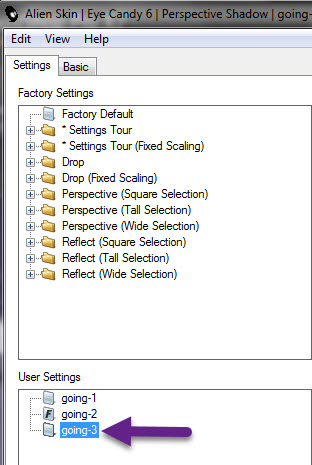
49 – Effects – Alien Skin – Eye Candy 6 – Text Selection – Perspective Shadow – Settings – going3
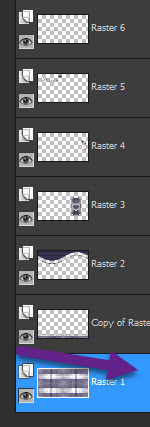
50 – Activate – Raster1 Layer
51 – Layers – New Raster Layer
52 – Fill with Background Color – #403a5c
53 – Layers – New Mask Layer – From Image – Narah_mask_0457.jpg
54 – Layers – Merge – Merge Grup
55 – Adjust – Sharpness – Sharpen
56 – Layers – Merge – Merge Visible
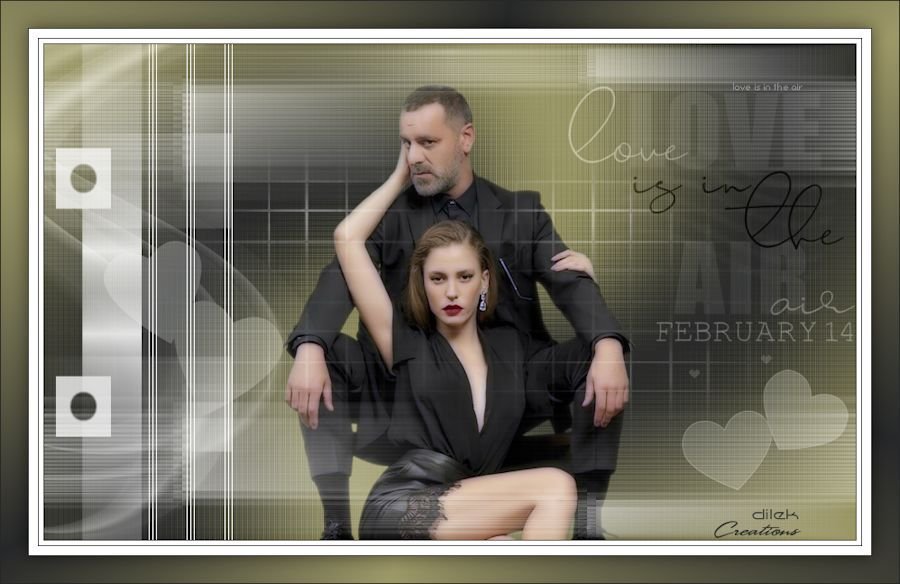
Result
57 – Edit – Copy
58 – File Open – Keep Going-Border Frame
59 – Edit – Past As New Layer
60- File Open – femme552-coly.png
61 – Edit – Copy
62 – Open Keep Going-Border Frame
Edit – Past As New Layer
Edit – Past As New Layer
63 – Image Resize – 60 Percent
64 – Effects – Image Effects – Offset
65 – Adjust – Sharpness – Sharpen
66 – Effects – 3D Effects – Drop Shadow – Same Settings
67 – File Open – Grisi_Tube_Decoration_316
68 – Edit – Copy
Go back to your work.
Go back to your work.
69 – Edit – Paste As New Layer
70 – Image Resize – 30 Percent
71 – Effects – Image Effects – Offset
72 – Effects – 3D Effects – Drop Shadow – Same Settings
73 – Write your signature
74 – Layers – Merge – Merge All Flaten
75 – Image – Resize 900 Piksel
76 – File – Save as jpeg
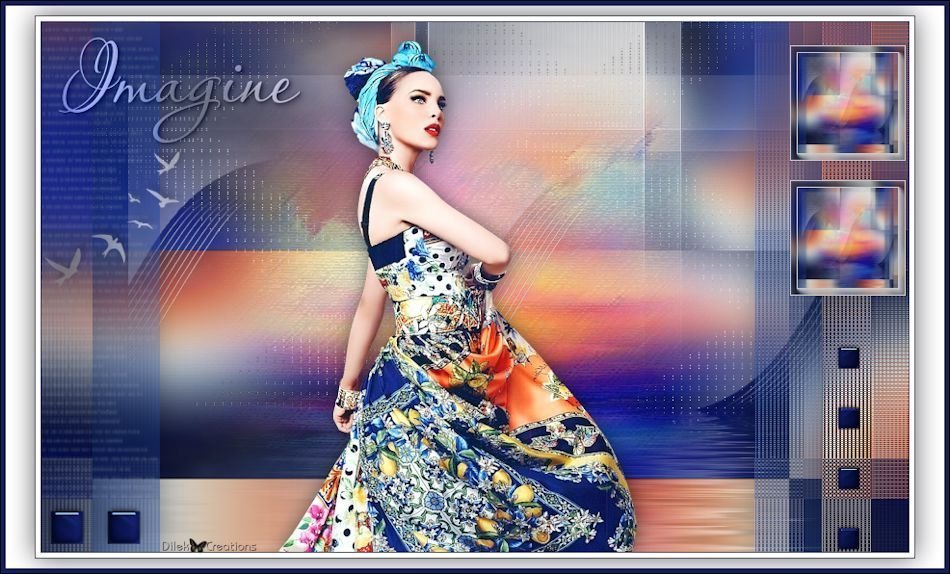
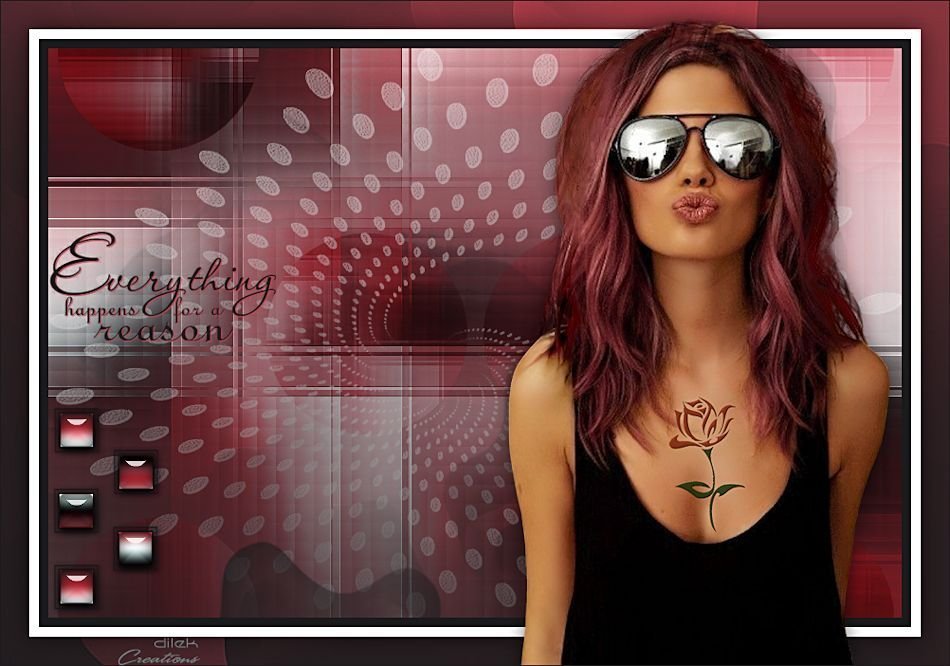
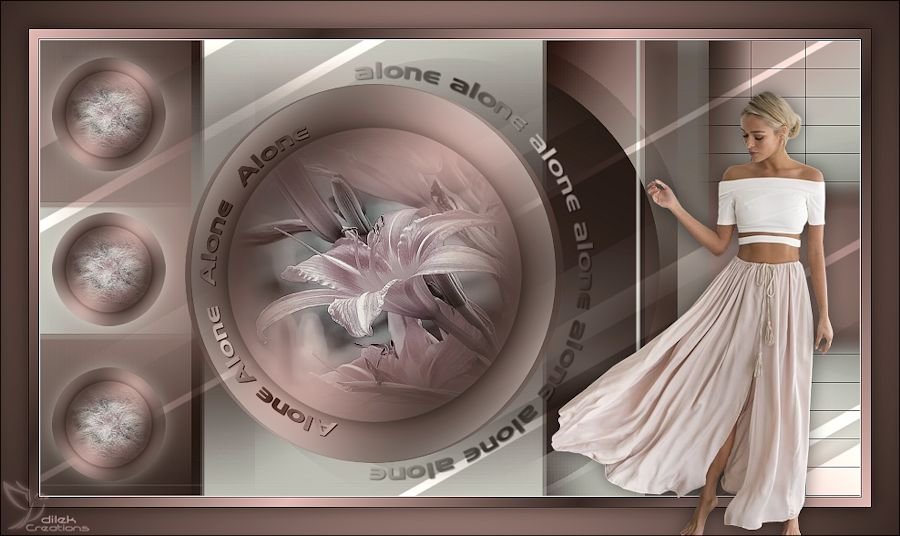
For Example

I would be very happy if you could send your nice work to my e-mail address.
My mail address
dilekmektubu@gmail.com