
English Psp TutorialThis tutorial was created with Corel X6.
However, it can also be done with other versions.
Thank you very much for the beautiful Translations.
You can access the translations by clicking on the flags.
I.C.NET Software – Filter Unlimited 2.0
Paper Textures – Japanese Paper
Materials
 or
or 

Go back to your work.
Edit Paste into Selection
5 – Selections – Select None
6 – Adjust – Bulur – Radial Blur

7 – Effects – Mehdi – Shorting Tiles

8 – Effects – Mehdi – Shorting Tiles

9 – Duplicate
10 – Effects – I.C.NET Software – Filter Unlimited 2.0
Paper Textures – Japanese Paper

11 – Layers Properties – Blend Mode – Soft Light
12 – Merge – Merge Down
13 – Duplicate
14 – Effects – I.C.NET Software – Filter Unlimited 2.0
Italian Editors Effect – Picture in Picture

15 – Merge – Merge Down
16 – Adjust – Sharpness – Sharpen
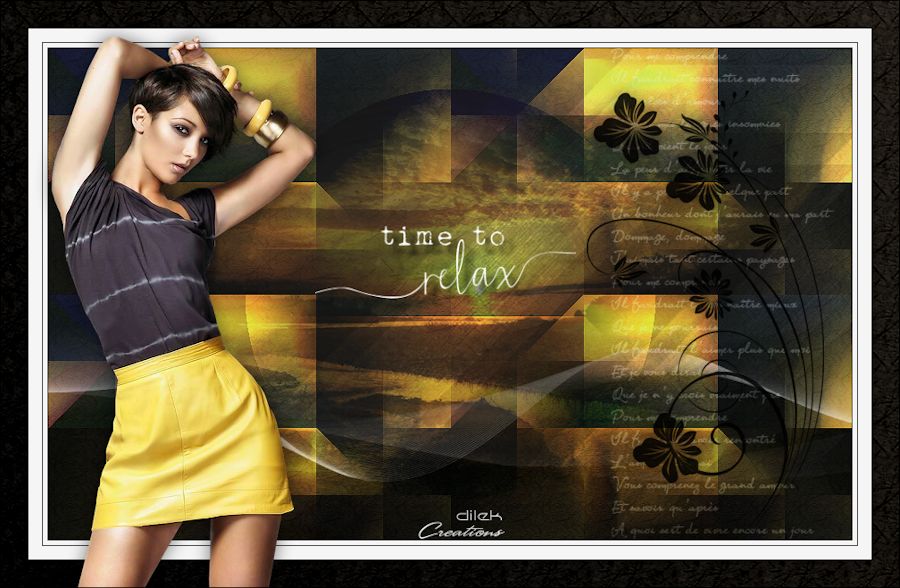
17 – File Open Tube-relax
Go back to your work.
Edit Paste As New Layer
19 – Layers Properties – Blend Mode – Soft Light
20 – Layers – New Raster Layer
21 – Flood Fill – #ffffff
22 – Layers – New Mask Layer – From image – Narah_Mask_0945
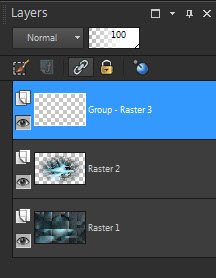
23 – Merge – Merge Grup

24 – Layers – New Raster Layer – Flood Fill – #ffffff
25 – Layers – New Mask Layer – From image – Relax-Mask
26 – Merge – Merge Grup
29 – Layers Properties – Blend Mode – Dodge

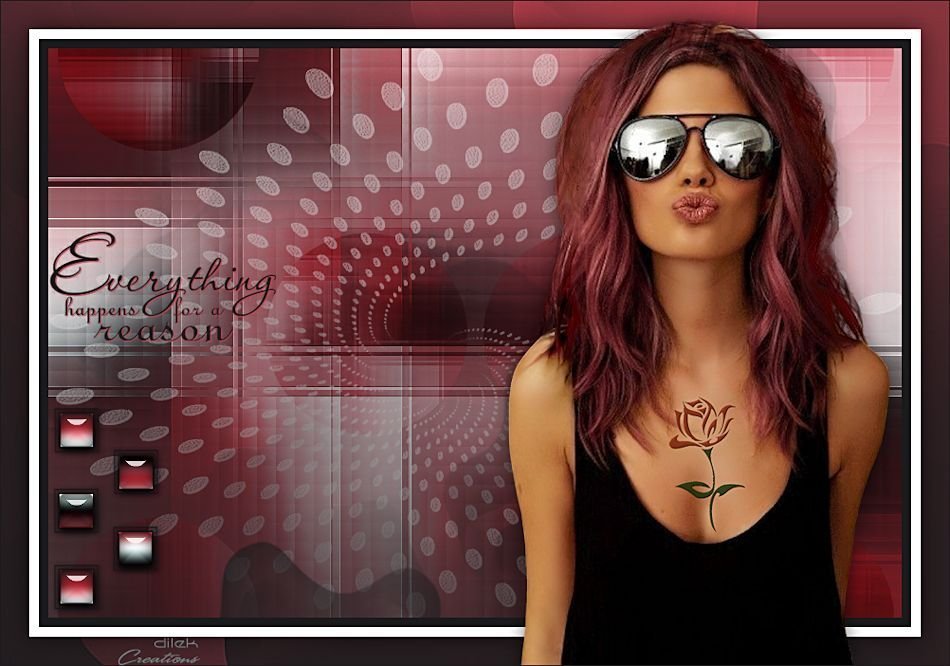
30 – File Open alenza_tube_540
Go back to your work.
Edit Paste As New Layer
32 – Activate Pick Tool

33 – Layers Properties – Blend Mode – Soft Light
34 – Merge – Merge Visible
35 – Layers – New Raster Layer
36 – Selections – Load /Save Selection – Load Selection From Disk – relax-sel

37 – Flood Fill – background color – Opacity : 50
38 – Effects – Texture Effects – Blinds

39 – Selections – Select None
40 – Effects – Toadies – What are you?

41 – Layers Properties – Blend Mode – Dodge
42 – Duplicate
43- Image – Mirror
44 – Image – Add Borders 1 Px – #000000
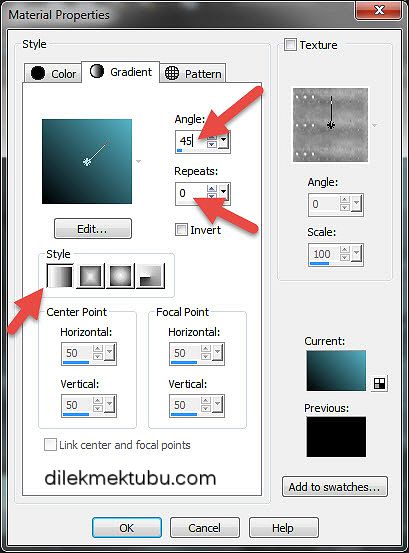
48 – Image – Add Borders 1 Px – #000000
49- Selections – Select All
50 – Image – Add Borders – 30 Px – #000000
51 – Selections – Invert
52 – Layers – New Raster Layer
53- Flood Fill Gradient
![]()

54 – Effects – I.C.NET Software – Filter Unlimited 2.0
Paper Textures – Japanese Paper

55 – Selections – Select Invert
56 – Effects – 3D Effect – Drop Shadow

57 – Selections – Select None
58 – File – Open – tube-bouquet
59 – Edit – Copy
Go back to your work.
Edit Paste As New Layer
60 – Activate Pick Tool ![]()
![]()
61 – Effects – 3D Effect – Drop Shadow
62 – File – Open relax-art
63 – Edit Copy – Edit Paste As New Layer
64 – Activate Pick Tool ![]()
![]()
65 – Alien Skin Eye Candy 5 Impact – Perpective Shadow – Drop Shadow High

66 – File – Open – 100_Femmes_Page7_Animabelle
67 – Edit – Copy
Go back to your work.
Edit Paste As New Layer
68 – Image – Resize – 75 percent
69 – Effects – Image Effects – Offset

70 – Adjust – Sharpness – Sharpen
71 – Effects – 3D Effect – Drop Shadow
72 – Write your signature